I started my food and travel blog back in 2014 and knew absolutely nothing about blogging!
After working hard at it, I’ve grown my little hobby of blogging about food and travel into a business that I love!
Over the years I’ve had a lot of people ask me how I started blogging, what tools I use, etc.
So I decided to put together a fun, helpful resource area on my blog that will help people like you start a blog!
Don’t let all of the technical stuff steer you away, I was a total non-techie person when I started blogging. I have learned quite a lot over the years and wanted to have a place to share what I’ve learned to make things easier for other people that want to start blogging but didn’t know where to start.
Ok let’s get started!
Disclaimer: Please note that some of the links below are affiliate links and I will earn a commission if you purchase through those links. I have used all of the products listed below and recommend them because they are helpful and are companies that I trust.
Step One: Domain Name and Hosting
Here’s the creative fun part!
What do you want your Domain name to be?
Mine is obviously tastefulventure.com. It took me a few days of research and thought to come up with this name. I wanted a name that was catchy and related to food and travel.
Here’s what worked for me-> Brainstorm as many ideas as possible. Think long term, what would be a good name that would fit your blog 1, 3, or 5 years down the road?
Once you’ve decided what your website will be called (your domain name) you will need to register the name and buy hosting. Hosting is a service which will “host” your website. It’s where your site will sit on the internet. Two of the biggest hosting providers are 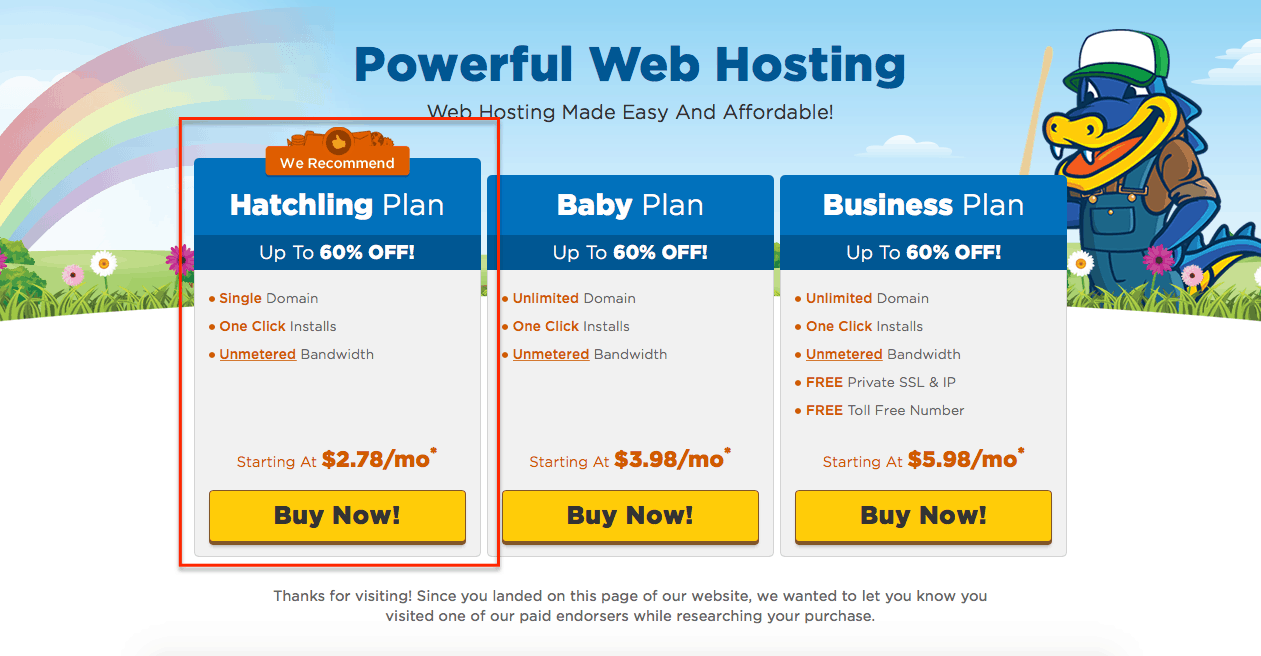
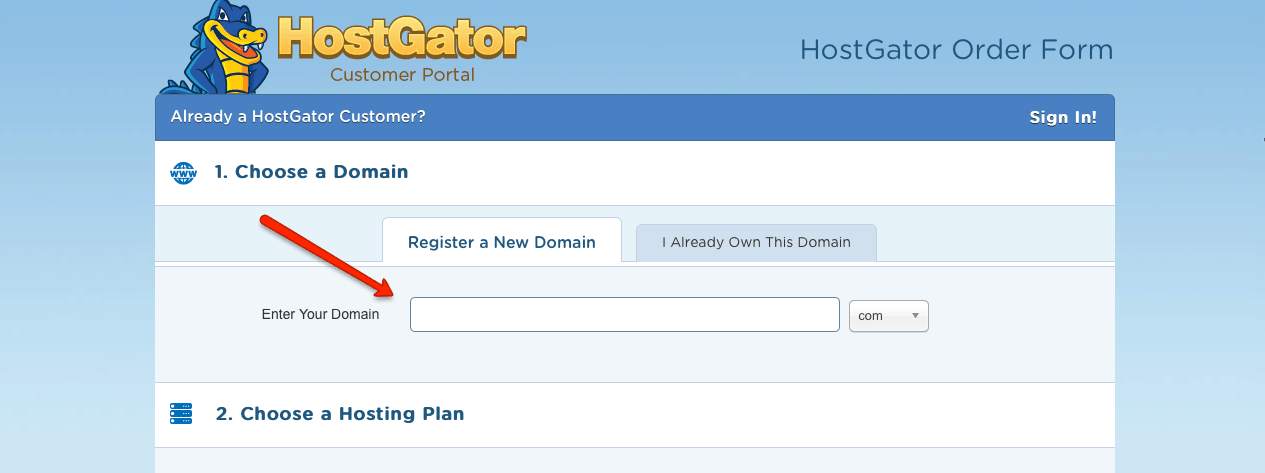
Once you choose the Hatchling plan, you’ll be sent to the order form. Enter the domain name you picked and choose your hosting plan (Hatchling). They will also ask you if you want to purchase any add on services. DO NOT PICK ANY. You won’t be needing them. From here, they’ll run your credit card and Boom! You now own a domain name!
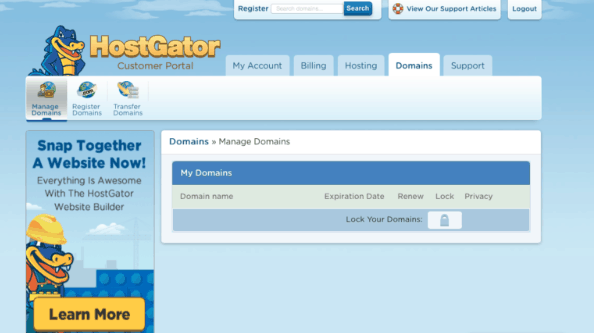
Once you pay, you’ll be directed to a screen where you can see your domain name and account info.
Great, we now have a place on the internet for our website to live! Next we need to set up your website. We’ll do this using WordPress. (WordPress is what actually runs your website – hosting is just the computer your site sits on. In other words, the place your site will live on the net).
Step Two: Installing WordPress
Once you’ve completed registration with HostGator you’ll need to go through the process of installing WordPress.
WordPress is a blogging software. It’s the software that I use for tastefulventure.com. The best part is that it’s SUPER easy to use and it’s also super easy to install on your website!
In the same screen as above, click the “hosting” tab and at the next screen (see below) click “Get Started with WordPress Today.”
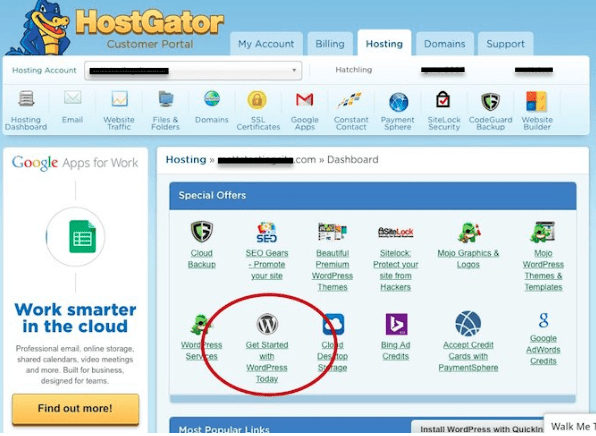
You’ll be at this screen. Click “WordPress”
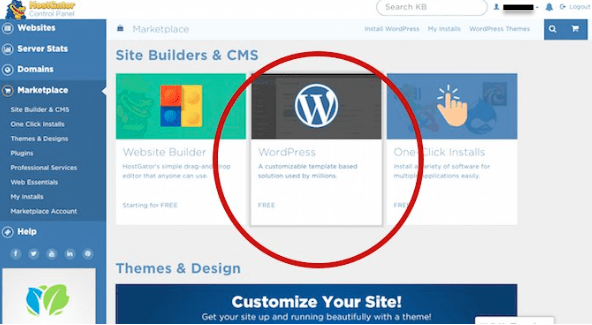
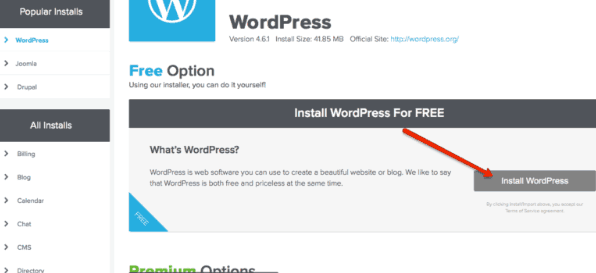
OR, it might take you to the “Quick Install” page. Find where it says “Install WordPress” and click it.
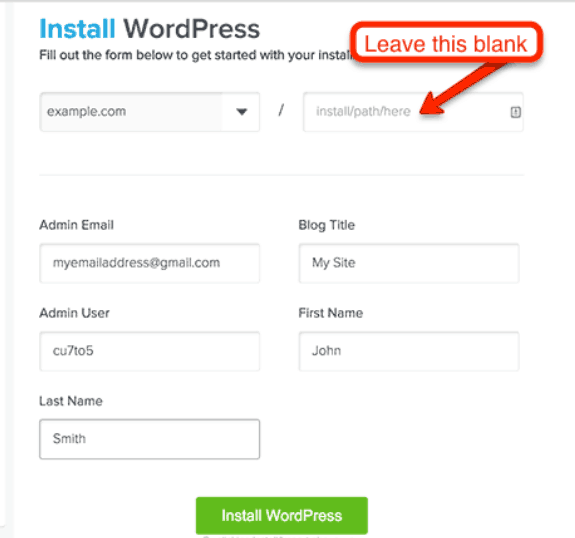
Enter your user information. Under blog title, enter your blog name. Create your username and hit install.
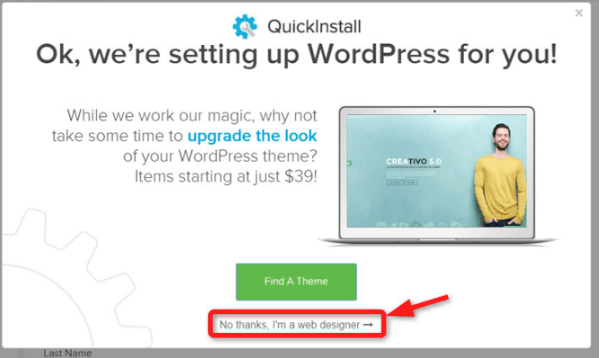
Once you click “Install WordPress” a screen like this might pop up. It’s just another up sell, so ignore it. Click “No Thanks, I’m a Web Designer.”
When the install is complete, it will take you to this screen. At the top, click on “View Credentials”

Your credentials are your Admin name and password. You’ll get an email with this same information. THAT’S IT! You’ve got a new website at your domain all set up! Now, let’s make your new website look good!
Step Three: Making Your Website Look Great
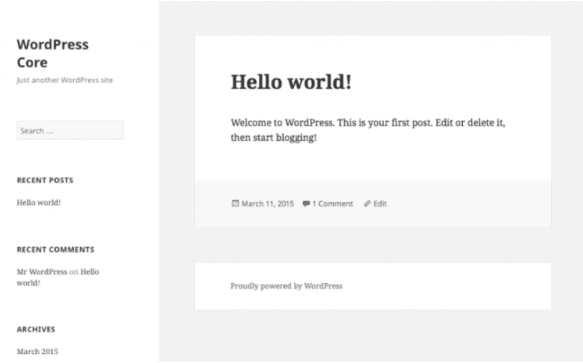
Your new website might not look like much at this point. It’s essentially a blank canvas. If you type in your new domain, your site might look something like this:
To get to the back end of your site (called the “dashboard”) you can either click the “Admin URL” that you received in your email, or type yourdomain.com/wp-admin and it will take you to your sign in page which looks like this:
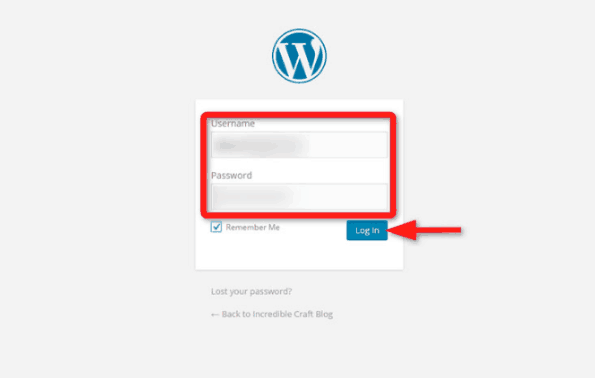
Enter your Username and password to log in! You’ll then be in the back door of your new website. From here we can change themes (how your site looks) using free themes and we can also install plugins (which add more functionality to your site).
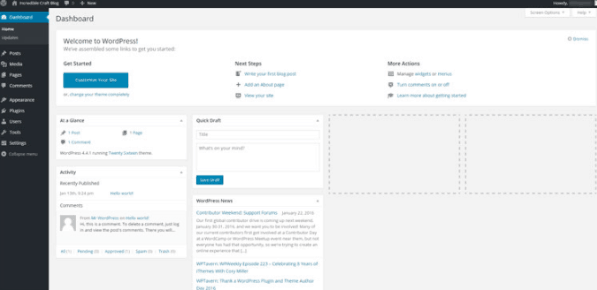
Let’s change the “Theme” of your site. Changing the theme means to change the look of it. There are TONS of free themes available for you to use. Here’s how to change it:
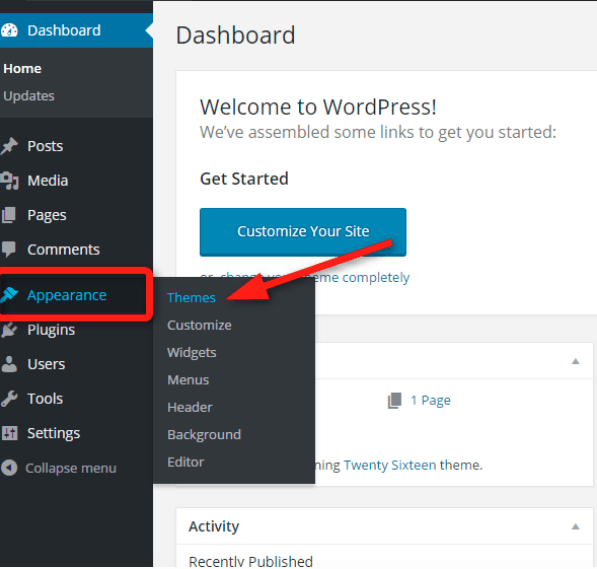
While in the back end of your site, on the left side, click “Appearance” then click “Themes”
Next, click “Add New”
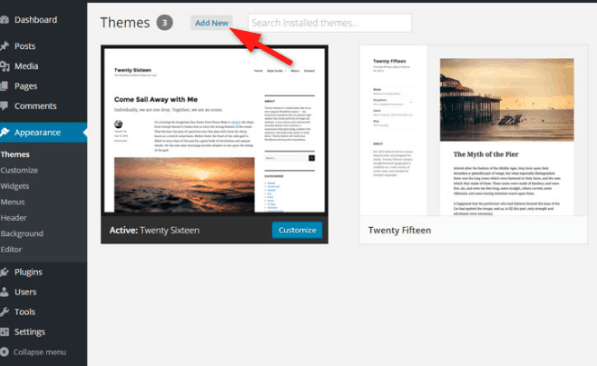
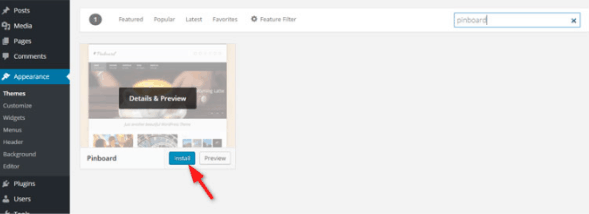
Scroll through the different themes until you find one you like! Once you find one, install.
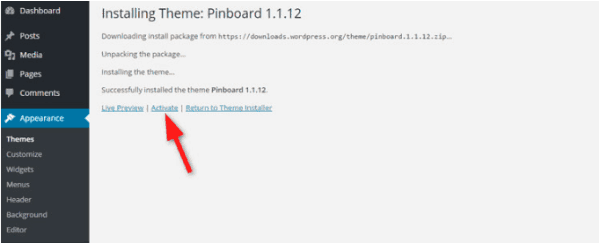
Once it installs, click “Activate”
Your site will now have a different look! Play around with the look of your site.
That’s pretty much it for the basics of how to get started. Have fun!
A word on self hosting vs. free hosting – When starting your blog, you have a couple of choices: Selfhosting ($4-$8 a month) or Free – Getting free hosting is NOT RECOMMENDED (Wix, Weebly Blogger, Tumbler etc)
Why not a free platform?
There are a lot of reasons you shouldn’t use a free platform for your blog:
- You won’t own your blog when it’s on a free platform. It’s like building a house on someone else’s land. Some free platforms may also put ads on your site. Ads that you don’t get paid for!
- You will have a long, ugly URL such as www.yourblog.blogspot.com.
- Let me stress, If you are on a free platform, you DO NOT own your blog or the URL. This means your blog could be shut down at any time. You don’t want to put your site in someone else’s hands just to save $5 a month.
Click HERE to get started with HostGator
